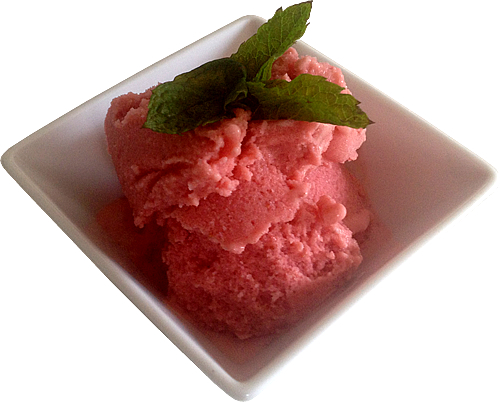
As the UK is in the midst of its’ first heatwave in 7 years, my taste buds and body temperature have been craving cooling foods.
I’m not usually a fan of ice cream – since eating cleaner my taste buds can’t handle the sweetness of shop bought ice creams and all those fancy flavours are annoyingly laced with gluten.
But this recipe has me cooling down with naturally sweet and flavourful ingredients. Replacing traditional milk/cream with coconut cream not only lends an exotic taste but also coconut cream is well tolerated for those with digestive problems and contains healthy fats.
I don’t own an ice cream maker… now that would be a gadget too far!
So I made this the old-fashioned and labour intensive way.
If you can commit to staying close to your freezer for 2-3 hours, then the result is a delicious, dairy free, naturally sweet treat.
Ingredients:
- 1 large punnet of fresh strawberries, hulled and chopped
- 1/2 medium size watermelon, rind removed and chopped
- 2x 160gram cans of coconut cream (thicker than coconut milk)
Optional Extras:
- 1 ripe banana will add extra sweetness if you need it
- You can add some chopped fresh mint
- You can add a tablespoon of your favourite natural fruit cordial (I made some with Bottle Green Elderflower Cordial and it was lush)
Make the Magic:
This method (without a fancy ice cream maker) requires a hand blender.
- Place strawberries and watermelon pieces into a jug and blitz with your hand blender until smooth. Do this in batches if you need to.
- Once you have your fruit mush, add the coconut cream to it and blend thoroughly again. Add your cordial or mint too if using.
- Transfer your mixture to a large, freezable container and place in the freezer without a lid on it, for approx 40 minutes.
- After 40 minutes take a look – it should be starting to freeze up around the edges.
- At this stage you want to remove it from the freezer and use your hand blender to blend the mixture thoroughly and disperse the frozen parts.
You can use a dinner knife to loosen the frozen mix from the container edges if necessary. - Put the container back in the freezer and set a timer for 30 minutes.
- Continue the process of blending the frozen mix thoroughly, every 30 minutes for about two and a half hours until the mix thickens evenly.
- At this stage I would recommend decanting the mixture into individual dishes to freeze and this is why:
When you want to enjoy your cooling treat, I recommend removing it from the freezer and leaving it on the side for 15 minutes or so before trying to eat it. This is because the ice cream is very frozen and solid… and I know it sounds obvious but it is super-cold! Give it time to soften slightly and ‘warm up’ ;-D
Enjoy on it’s own or with wedges of watermelon.


