

What do I eat instead of a sandwich???
This must be the ultimate ‘life after bread’ question, and the one I’m answering in this week’s video.
If you struggle to find healthy alternatives to bread, this week’s post is going to change your lunchtime forever!
And if you are health conscious enough to own a juicer but feel bad about the waste it creates, the recipe below will also change the way you think about your juicer.
Because not only am I going to show you one of the simplest and most health-promoting juices you can make, the juicer pulp also has some very special sandwich skills… it will all make sense when you watch the video below!
Even if you just own a blender, you can still make this recipe and benefit from a digestion and waistline-friendly alternative to bread.
Who knew you could use your juicer to create amazing foods to replace those starchy carbs that we all eat too much of! Pretty cool, huh.
And not only are you doing your digestion, energy levels and waistline a favour by eating these fibre-rich wraps, you will save money and reduce waste by using pulp that would usually end up on the compost heap.
Both versions of the recipe are below.
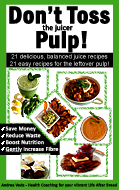
But if you’re intrigued as to how you can use your juicer pulp in even more ways, my new book Don’t Toss The Juicer Pulp will be available very soon.
You can join the VIP list here to get a FREE download of the book when it’s published:
Here are the juice and wrap recipes exactly as I made them in the video.

broccoli has powerful anti-cancer nutrients
The Anti-Cancer Shot
Ingredients
1 large head of broccoli or 2 large handfuls of sprouting broccoli
Juice all the broccoli and drink it like a shot!
I enjoy the distinctive taste of this juice, but if you are new to juicing veggies it may be preferable to down it quickly!
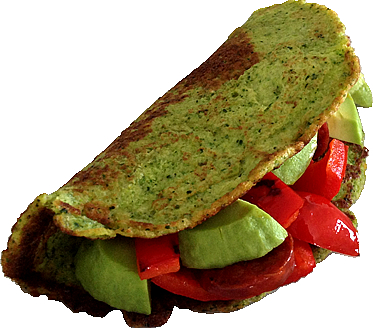
juicer pulp broccoli wrap
Grain-Free Juicer-Pulp Broccoli Wraps
These wraps will literally change your lunch time!
Try this recipe to make a delicious alternative to bread wraps and sandwiches.
The fibre content will keep you fuller for longer and with no grains or artificial additives to irritate your digestion.
Ingredients
- All the pulp from the Anti-Cancer Shot Juice – 1 cup or more
- 3 eggs
- Oil – avocado or olive oil work best
Equipment Tips:
Silicone baking trays and a wide, flat spatula make these so easy to flip over.
You can use a metal baking tray lined with baking/greaseproof paper, generously oiled.
Juicer Pulp Method
- Preheat oven to 190c
- In a mixing jug, thoroughly combine the pulp and eggs with 3 tablespoons of oil
- Generously oil a silicone baking tray or a metal tray lined with baking paper
- Use a large spoon to drop dollops of the mixture onto the baking tray and spread into rounds approx. ¼ inch thick. Don’t worry about neatness here, they look nice and rustic this way and you don’t waste time on neatness!
- Bake in oven for 15 minutes until the wraps are set in the middle and browning slightly on the edges
- Remove from oven and use a wide, flat spatula to ease underneath each wrap and flip it over.
- Return the flipped wraps to the oven for a further 5 minutes, then transfer to a cold plate or board to cool.
Blender Method
Ingredients
- Florets from 1 whole broccoli or 2 large handfuls of sprouting broccoli
- 3 eggs
- Oil – avocado or olive oil work best
Make the Magic
- Preheat oven to 190c
- Roughly chop the broccoli florets and place in a jug blender, or in a large jug if using a hand blender
- Add the eggs and 3 tablespoons of oil to the broccoli and blend until the mixture resembles a thick batter.
- Generously oil a silicone baking tray or a metal tray lined with baking paper
- Use a large spoon to drop dollops of the mixture onto the baking tray and spread into rounds approx. ¼ inch thick. Don’t worry about neatness here, they look nice and rustic this way and you don’t waste time on neatness!
- Bake in oven for 15 minutes until the wraps are set in the middle and browning slightly on the edges
- Remove from oven and use a wide, flat spatula to ease underneath each wrap and flip it over.
- Return the flipped wraps to the oven for a further 5 minutes, then transfer to a cold plate or board to cool.
You can gently fold them into ‘taco’ shape wraps when they are still warm if you prefer, as they will hold this shape whilst cooling without creasing.
Use your favourite sandwich fillings inside these wraps.
You can store these in the fridge for 3 days or freeze individually – they defrost quickly.
So tell me, will you give these bread-free wraps a try now you see how simple they are to make?
Please leave a comment below and tell me what you think!